使用 TDD 测试驱动开发来构建 Laravel REST API

TDD 以及敏捷开发的先驱者之一的 James Grenning有句名言:
如果你没有进行测试驱动开发,那么你应该正在做开发后堵漏的事 - James Grenning
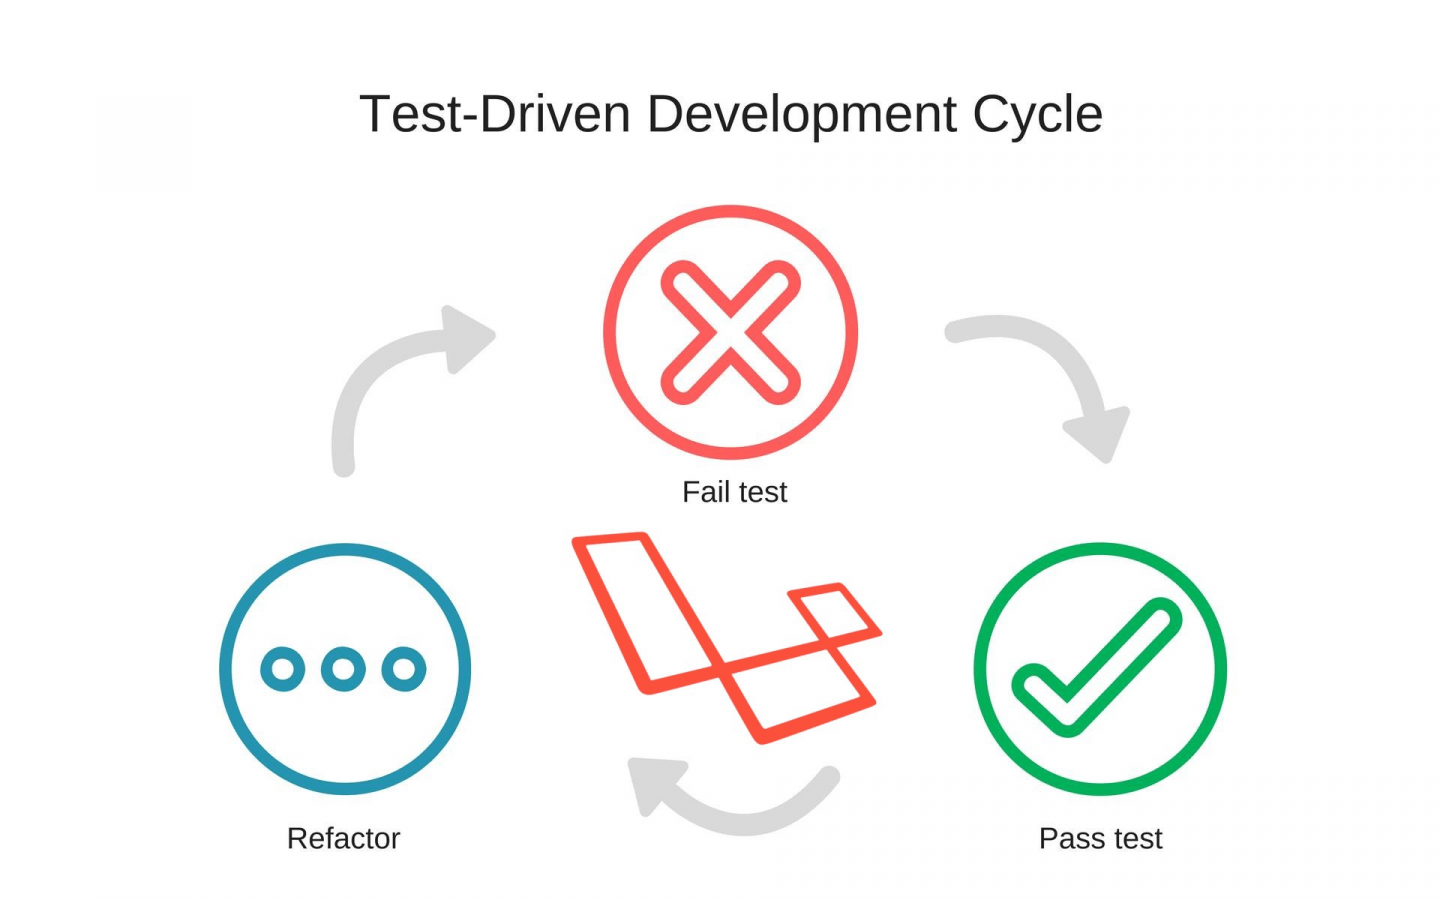
今天我们将进行一场基于 Laravel 的测试驱动开发之旅。 我们将创建一个完整的 Laravel REST API,其中包含身份验证和 CRUD 功能,而无需打开 Postman 或浏览器。?
项目设置
首先创建一个新的 Laravel 项目 composer create-project --prefer-dist laravel/laravel tdd-journey。
然后,我们需要创建 用户认证 脚手架,执行 php artisan make:auth ,设置好 .env 文件中的数据库配置后,执行数据库迁移 php artisan migrate。
本测试项目并不会使用到刚生成的用户认证相关的路由和视图。我们将使用 jwt-auth。所以需要继续 安装 jwt 到项目。
注意:如果您在执行
jwt:generate指令时遇到错误, 您可以参考 这里解决这个问题,直到 jwt 被正确安装到项目中。
最后,您需要在 tests/Unit 和 tests/Feature 目录中删除 ExampleTest.php 文件,使我们的测试结果不被影响。
编码
- 首先将 JWT 驱动配置为
auth配置项的默认值:
<?php
// config/auth.php file
'defaults' => [
    'guard' => 'api',
    'passwords' => 'users',
],
'guards' => [
    ...
    'api' => [
        'driver' => 'jwt',
        'provider' => 'users',
    ],
],
然后将如下内容放到你的 routes/api.php 文件里:
<?php
Route::group(['middleware' => 'api', 'prefix' => 'auth'], function () {
    Route::post('authenticate', 'AuthController@authenticate')->name('api.authenticate');
    Route::post('register', 'AuthController@register')->name('api.register');
});- 现在我们已经将驱动设置完成了,如法炮制,去设置你的用户模型:
<?php
...
class User extends Authenticatable implements JWTSubject
{
    ...
     //获取将被存储在 JWT 主体 claim 中的标识
    public function getJWTIdentifier()
    {
        return $this->getKey();
    }
    // 返回一个键值对数组,包含要添加到 JWT 的任何自定义 claim
    public function getJWTCustomClaims()
    {
        return [];
    }
}
我们所需要做的就是实现 JWTSubject 接口然后添加相应的方法即可。
- 接下来,我们需要增加权限认证方法到控制器中.
运行 php artisan make:controller AuthController 并且添加以下方法:
<?php
...
class AuthController extends Controller
{

    public function authenticate(Request $request){
        // 验证字段
        $this->validate($request,['email' => 'required|email','password'=> 'required']);
        // 测试验证
        $credentials = $request->only(['email','password']);
        if (! $token = auth()->attempt($credentials)) {
            return response()->json(['error' => 'Incorrect credentials'], 401);
        }
        return response()->json(compact('token'));
    }
    public function register(Request $request){
        // 表达验证
        $this->validate($request,[
            'email' => 'required|email|max:255|unique:users',
            'name' => 'required|max:255',
            'password' => 'required|min:8|confirmed',
        ]);
        // 创建用户并生成 Token
        $user =  User::create([
            'name' => $request->input('name'),
            'email' => $request->input('email'),
            'password' => Hash::make($request->input('password')),
        ]);
        $token = JWTAuth::fromUser($user);
        return response()->json(compact('token'));
    }
}
这一步非常直接,我们要做的就是添加 authenticate 和 register 方法到我们的控制器中。在 authenticate 方法,我们验证了输入,尝试去登录,如果成功就返回令牌。在 register 方法,我们验证输入,然后基于此创建一个用户并且生成令牌。
4. 接下来,我们进入相对简单的部分。 测试我们刚写入的内容。 使用 php artisan make:test AuthTest 生成测试类。 在新的 tests / Feature / AuthTest 中添加以下方法:
<?php
/**
 * @test
 * Test registration
 */
public function testRegister(){
    //创建测试用户数据
    $data = [
        'email' => 'test@gmail.com',
        'name' => 'Test',
        'password' => 'secret1234',
        'password_confirmation' => 'secret1234',
    ];
    //发送 post 请求
    $response = $this->json('POST',route('api.register'),$data);
    //判断是否发送成功
    $response->assertStatus(200);
    //接收我们得到的 token
    $this->assertArrayHasKey('token',$response->json());
    //删除数据
    User::where('email','test@gmail.com')->delete();
}
/**
 * @test
 * Test login
 */
public function testLogin()
{
    //创建用户
    User::create([
        'name' => 'test',
        'email'=>'test@gmail.com',
        'password' => bcrypt('secret1234')
    ]);
    //模拟登陆
    $response = $this->json('POST',route('api.authenticate'),[
        'email' => 'test@gmail.com',
        'password' => 'secret1234',
    ]);
    //判断是否登录成功并且收到了 token
    $response->assertStatus(200);
    $this->assertArrayHasKey('token',$response->json());
    //删除用户
    User::where('email','test@gmail.com')->delete();
}
上面代码中的几行注释概括了代码的大概作用。 您应该注意的一件事是我们如何在每个测试中创建和删除用户。 测试的全部要点是它们应该彼此独立并且应该在你的理想情况下存在数据库中的状态。
如果你想全局安装它,可以运行 $ vendor / bin / phpunit 或 $ phpunit 命令。 运行后它应该会给你返回是否安装成功的数据。 如果不是这种情况,您可以浏览日志,修复并重新测试。 这就是 TDD 的美丽之处。
5. 对于本教程,我们将使用『菜谱 Recipes』作为我们的 CRUD 数据模型。
首先创建我们的迁移数据表 php artisan make:migration create_recipes_table 并添加以下内容:
<?php
...
public function up()
{
    Schema::create('recipes', function (Blueprint $table) {
        $table->increments('id');
        $table->string('title');
        $table->text('procedure')->nullable();
        $table->tinyInteger('publisher_id')->nullable();
        $table->timestamps();
    });
}
public function down()
{
    Schema::dropIfExists('recipes');
}
然后运行数据迁移。 现在使用命令 php artisan make:model Recipe 来生成模型并将其添加到我们的模型中。
<?php
...
protected $fillable = ['title','procedure'];
/**
 * 发布者
 * @return \Illuminate\Database\Eloquent\Relations\BelongsTo
 */
public function publisher(){
    return $this->belongsTo(User::class);
}
然后将此方法添加到 user 模型。
<?php
...
  /**
 * 获取所有菜谱
 * @return \Illuminate\Database\Eloquent\Relations\HasMany
 */
public function recipes(){
    return $this->hasMany(Recipe::class);
}
6. 现在我们需要最后一部分设置来完成我们的食谱管理。 首先,我们将创建控制器 php artisan make:controller RecipeController 。 接下来,编辑 routes / api.php 文件并添加 create 路由端点。
<?php
...
  Route::group(['middleware' => ['api','auth'],'prefix' => 'recipe'],function (){
    Route::post('create','RecipeController@create')->name('recipe.create');
});
在控制器中,还要添加 create 方法
<?php
...
  public function create(Request $request){
    //验证数据
    $this->validate($request,['title' => 'required','procedure' => 'required|min:8']);
    //创建配方并附加到用户
    $user = Auth::user();
    $recipe = Recipe::create($request->only(['title','procedure']));
    $user->recipes()->save($recipe);
    //返回 json 格式的食谱数据
    return $recipe->toJson();
}
使用 php artisan make:test RecipeTest 生成功能测试并编辑内容,如下所示:
<?php
...
class RecipeTest extends TestCase
{
    use RefreshDatabase;
    ...
    //创建用户并验证用户身份
    protected function authenticate(){
        $user = User::create([
            'name' => 'test',
            'email' => 'test@gmail.com',
            'password' => Hash::make('secret1234'),
        ]);
        $token = JWTAuth::fromUser($user);
        return $token;
    }

    public function testCreate()
    {
        //获取 token
        $token = $this->authenticate();
        $response = $this->withHeaders([
            'Authorization' => 'Bearer '. $token,
        ])->json('POST',route('recipe.create'),[
            'title' => 'Jollof Rice',
            'procedure' => 'Parboil rice, get pepper and mix, and some spice and serve!'
        ]);
        $response->assertStatus(200);
    }
}
上面的代码你可能还是不太理解。我们所做的就是创建一个用于处理用户注册和 token 生成的方法,然后在 testCreate() 方法中使用该 token 。注意使用 RefreshDatabase trait ,这个 trait 是 Laravel 在每次测试后重置数据库的便捷方式,非常适合我们漂亮的小项目。
好的,所以现在,我们只要判断当前请求是否是响应状态,然后继续运行 $ vendor/bin/phpunit 。
如果一切运行顺利,您应该收到错误。 ?
There was 1 failure:
1) Tests\Feature\RecipeTest::testCreate
Expected status code 200 but received 500.
Failed asserting that false is true./home/user/sites/tdd-journey/vendor/laravel/framework/src/Illuminate/Foundation/Testing/TestResponse.php:133
/home/user/sites/tdd-journey/tests/Feature/RecipeTest.php:49FAILURES!
Tests: 3, Assertions: 5, Failures: 1.
查看日志文件,我们可以看到罪魁祸首是 Recipe 和 User 类中的 publisher 和 recipes 的关系。 Laravel 尝试在表中找到一个字段为 user_id 的列并将其用作于外键,但在我们的迁移中,我们将publisher_id设置为外键。 现在,将行调整为:
//食谱文件
public function publisher(){
    return $this->belongsTo(User::class,'publisher_id');
}
//用户文件
public function recipes(){
    return $this->hasMany(Recipe::class,'publisher_id');
}
然后重新运行测试。 如果一切顺利,我们将获得所有绿色测试!?
...
3 / 3 (100%)
...
OK (3 tests, 5 assertions)
现在我们仍然需要测试创建配方的方法。为此,我们可以判断用户的『菜谱 Recipes』计数。更新你的 testCreate 方法,如下所示:
<?php
...
//获取 token
$token = $this->authenticate();
$response = $this->withHeaders([
    'Authorization' => 'Bearer '. $token,
])->json('POST',route('recipe.create'),[
    'title' => 'Jollof Rice',
    'procedure' => 'Parboil rice, get pepper and mix, and some spice and serve!'
]);
$response->assertStatus(200);
//得到计数做出判断
$count = User::where('email','test@gmail.com')->first()->recipes()->count();
$this->assertEquals(1,$count);
我们现在可以继续编写其余的方法。首先,编写我们的 routes/api.php
<?php
...
Route::group(['middleware' => ['api','auth'],'prefix' => 'recipe'],function (){
    Route::post('create','RecipeController@create')->name('recipe.create');
    Route::get('all','RecipeController@all')->name('recipe.all');
    Route::post('update/{recipe}','RecipeController@update')->name('recipe.update');
    Route::get('show/{recipe}','RecipeController@show')->name('recipe.show');
    Route::post('delete/{recipe}','RecipeController@delete')->name('recipe.delete');
});
接下来,我们将方法添加到控制器。 以下面这种方式更新 RecipeController 类。
<?php
....
//创建配方
public function create(Request $request){
    //验证
    $this->validate($request,['title' => 'required','procedure' => 'required|min:8']);
    //创建配方并附加到用户
    $user = Auth::user();
    $recipe = Recipe::create($request->only(['title','procedure']));
    $user->recipes()->save($recipe);
    //返回配方的 json 格式数据
    return $recipe->toJson();
}
//获取所有的配方
public function all(){
    return Auth::user()->recipes;
}
//更新配方
public function update(Request $request, Recipe $recipe){
    //检查用户是否是配方的所有者
    if($recipe->publisher_id != Auth::id()){
        abort(404);
        return;
    }
    //更新并返回
    $recipe->update($request->only('title','procedure'));
    return $recipe->toJson();
}
//显示单个食谱的详细信息
public function show(Recipe $recipe){
    if($recipe->publisher_id != Auth::id()){
        abort(404);
        return;
    }
    return $recipe->toJson();
}
//删除一个配方
public function delete(Recipe $recipe){
    if($recipe->publisher_id != Auth::id()){
        abort(404);
        return;
    }
    $recipe->delete();
}
代码和注释已经很好地解释了这个逻辑。
最后我们的 test/Feature/RecipeTest:
<?php
...
  use RefreshDatabase;
protected $user;
// 创建用户并验证他
protected function authenticate(){
    $user = User::create([
        'name' => 'test',
        'email' => 'test@gmail.com',
        'password' => Hash::make('secret1234'),
    ]);
    $this->user = $user;
    $token = JWTAuth::fromUser($user);
    return $token;
}
// 测试创建路由
public function testCreate()
{
    // 获取令牌
    $token = $this->authenticate();
    $response = $this->withHeaders([
        'Authorization' => 'Bearer '. $token,
    ])->json('POST',route('recipe.create'),[
        'title' => 'Jollof Rice',
        'procedure' => 'Parboil rice, get pepper and mix, and some spice and serve!'
    ]);
    $response->assertStatus(200);
    // 获取计数并断言
    $count = $this->user->recipes()->count();
    $this->assertEquals(1,$count);
}
// 测试显示所有路由
public function testAll(){
    // 验证并将配方附加到用户
    $token = $this->authenticate();
    $recipe = Recipe::create([
        'title' => 'Jollof Rice',
        'procedure' => 'Parboil rice, get pepper and mix, and some spice and serve!'
    ]);
    $this->user->recipes()->save($recipe);
    // 调用路由并断言响应
    $response = $this->withHeaders([
        'Authorization' => 'Bearer '. $token,
    ])->json('GET',route('recipe.all'));
    $response->assertStatus(200);
    // 断言计数为1,第一项的标题相关
    $this->assertEquals(1,count($response->json()));
    $this->assertEquals('Jollof Rice',$response->json()[0]['title']);
}
// 测试更新路由
public function testUpdate(){
    $token = $this->authenticate();
    $recipe = Recipe::create([
        'title' => 'Jollof Rice',
        'procedure' => 'Parboil rice, get pepper and mix, and some spice and serve!'
    ]);
    $this->user->recipes()->save($recipe);
    // 调用路由并断言响应
    $response = $this->withHeaders([
        'Authorization' => 'Bearer '. $token,
    ])->json('POST',route('recipe.update',['recipe' => $recipe->id]),[
        'title' => 'Rice',
    ]);
    $response->assertStatus(200);
    // 断言标题是新标题
    $this->assertEquals('Rice',$this->user->recipes()->first()->title);
}
// 测试单一的展示路由
public function testShow(){
    $token = $this->authenticate();
    $recipe = Recipe::create([
        'title' => 'Jollof Rice',
        'procedure' => 'Parboil rice, get pepper and mix, and some spice and serve!'
    ]);
    $this->user->recipes()->save($recipe);
    $response = $this->withHeaders([
        'Authorization' => 'Bearer '. $token,
    ])->json('GET',route('recipe.show',['recipe' => $recipe->id]));
    $response->assertStatus(200);
    // 断言标题是正确的
    $this->assertEquals('Jollof Rice',$response->json()['title']);
}
// 测试删除路由
public function testDelete(){
    $token = $this->authenticate();
    $recipe = Recipe::create([
        'title' => 'Jollof Rice',
        'procedure' => 'Parboil rice, get pepper and mix, and some spice and serve!'
    ]);
    $this->user->recipes()->save($recipe);
    $response = $this->withHeaders([
        'Authorization' => 'Bearer '. $token,
    ])->json('POST',route('recipe.delete',['recipe' => $recipe->id]));
    $response->assertStatus(200);
    // 断言没有食谱
    $this->assertEquals(0,$this->user->recipes()->count());
}
除了附加测试之外,我们还添加了一个类范围的 $user 属性。 这样,我们不止可以利用 $user 来使用 authenticate 方法不仅生成令牌,而且还为后续其他对 $user 的操作做好了准备。
现在运行 $ vendor/bin/phpunit 如果操作正确,你应该进行所有绿色测试。
结论
希望这能让你深度了解在 TDD 在 Laravel 项目中的运行方式。 他绝对是一个比这更宽泛的概念,一个不受特地方法约束的概念。
虽然这种开发方法看起来比常见的调试后期程序要耗时, 但他很适合在代码中尽早捕获错误。虽然有些情况下非 TDD 方式会更有用,但习惯于 TDD 模式开发是一种可靠的技能和习惯。
本演练的全部代码可参见 Github here 仓库。请随意使用。
干杯!
本文中的所有译文仅用于学习和交流目的,转载请务必注明文章译者、出处、和本文链接
我们的翻译工作遵照 CC 协议,如果我们的工作有侵犯到您的权益,请及时联系我们。


 关于 LearnKu


推荐文章: